
Building a Portable Bracing Table for Relief Carving
As I mentioned at the end of a post a couple weeks ago, I’ve been looking to put together some sort of system that allows me to more safely do relief carving. Previously I dabbled with holding the wood in one hand (in a carving glove), which I found horribly unstable for any sort of intricate work, as well as a ticking time bomb for cutting myself. I then graduated to using a window ledge as a table and bracing the wood against the wall and the window. In the interest of not losing my security deposit on this apartment, that experiment was also short lived.
Fortunately this past weekend I found myself at my parents, in particular a basement complete with the equipment and scrap wood necessary to put together the DIY bracing table I referenced in the post above. Below are some of my notes around tweaks my dad and I made to the instructions, and some notes about what I would change if I was to build it again.
Overview
For some background on what this bracing table actually is used for, relief carving is a type of woodworking that relies on chisels and gouges to take a block of wood and recess the parts of the “canvas” that represent dead space until you are left with what ends up looking like something sticking out of the wood. Typically what I’ve seen in relief carving is some sort of landscape or object that is represented in different levels of depth, and there is a wide variety of how complex projects are. The first project I worked on was a pretty low relief, maybe a half inch deep, and the leaf that I made was about the same depth everywhere.
Based on this, the idea is that you use your tools to push into the wood and slice pieces of wood out with a gouge. This requires you to push forward with your tools, and to have something to push against. You can see why pushing a sharp tool in the same direction that my other hand is trying to keep the wood from moving could be dangerous. Someone with more space (or a woodshop) can have a dedicated table purely for holding their relief carvings in a very sturdy and flexible fashion.
For instance, something like this Carver’s Bench would let me move pegs around to hold a piece of wood in place and change the incline. It also costs $1,000, but who’s counting.
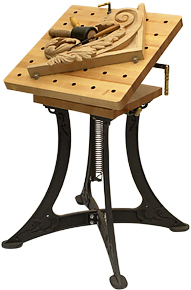
Without wanting to spend that kind of money and having limited space, a portable bracing table was a good solution. It lets me have some of the benefits of holding my wood in place (albeit with some drawbacks) at a very cheap price, which allows me to figure out how dedicated I am to this particular type of woodworking before making a larger investment.
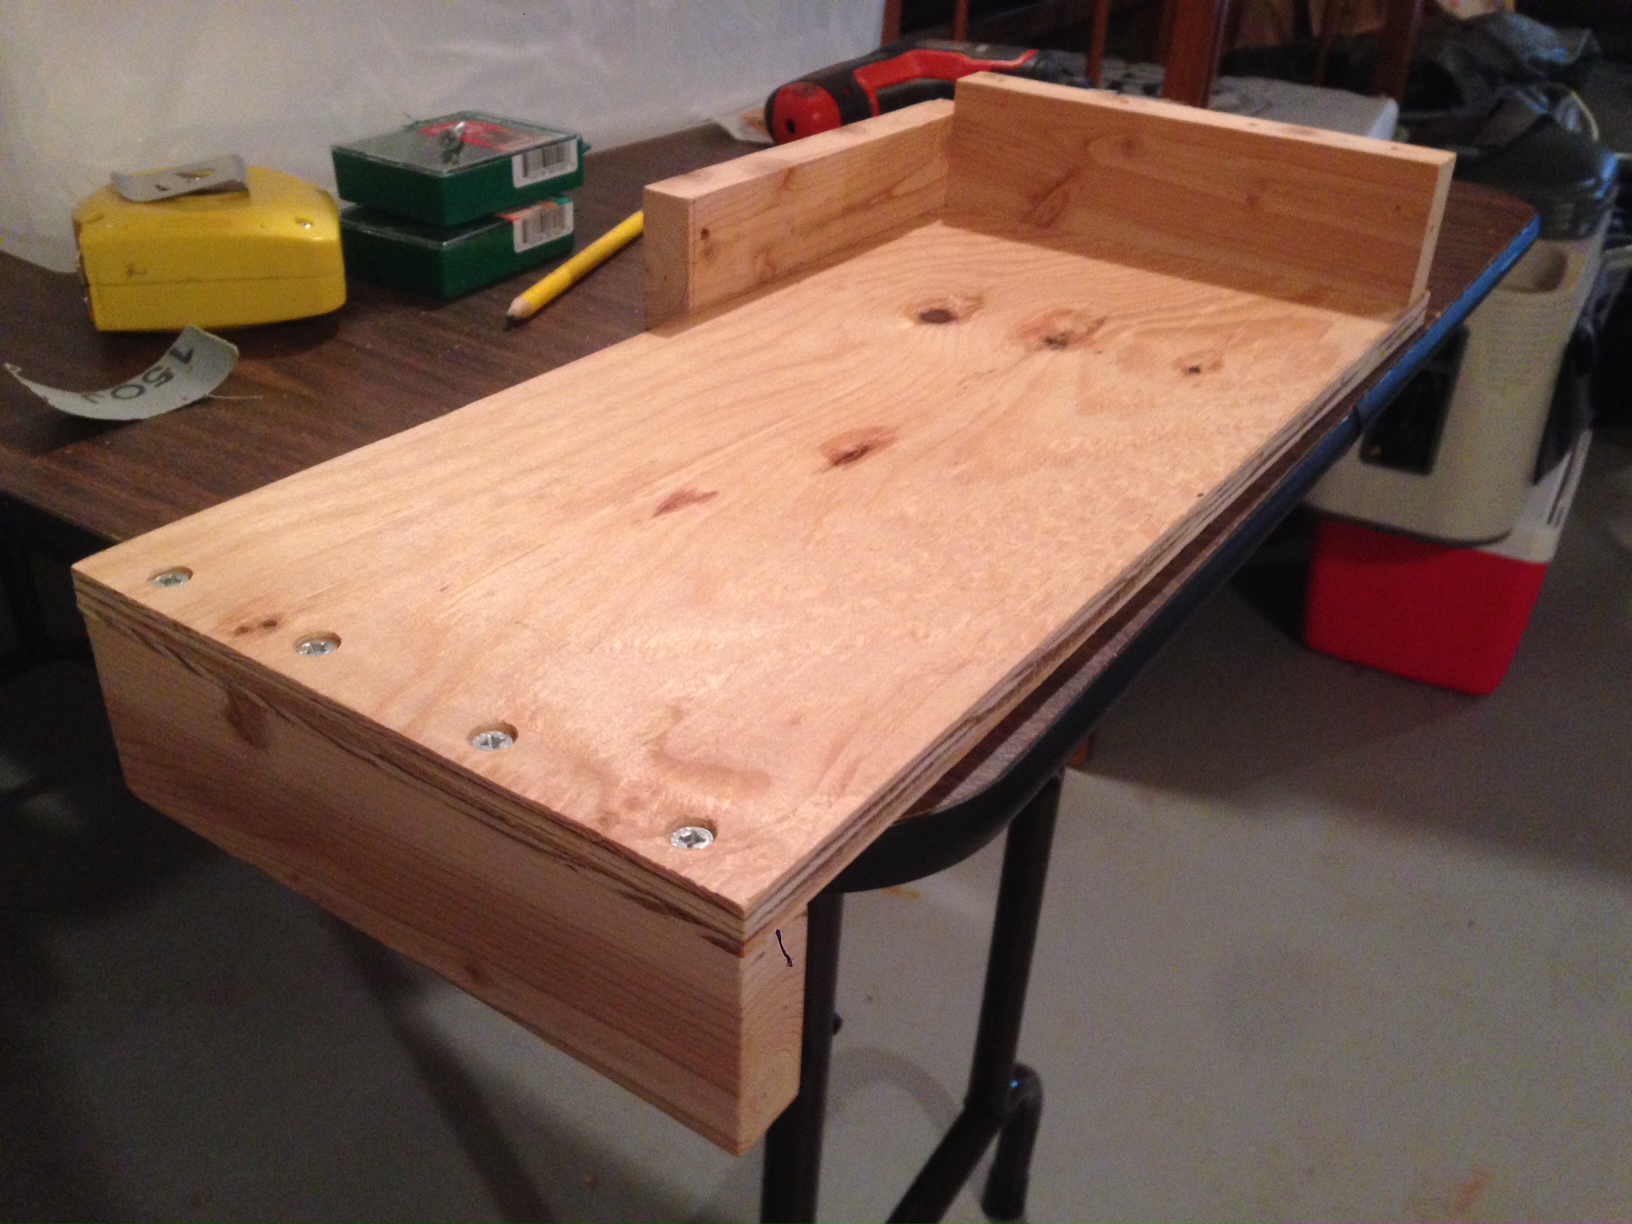
Building the Bracing Table
As I mentioned earlier, I leveraging the instructions for a bracing table from this website. For the most part, the instructions were solid. However, there were a few tweaks that we ended up making.
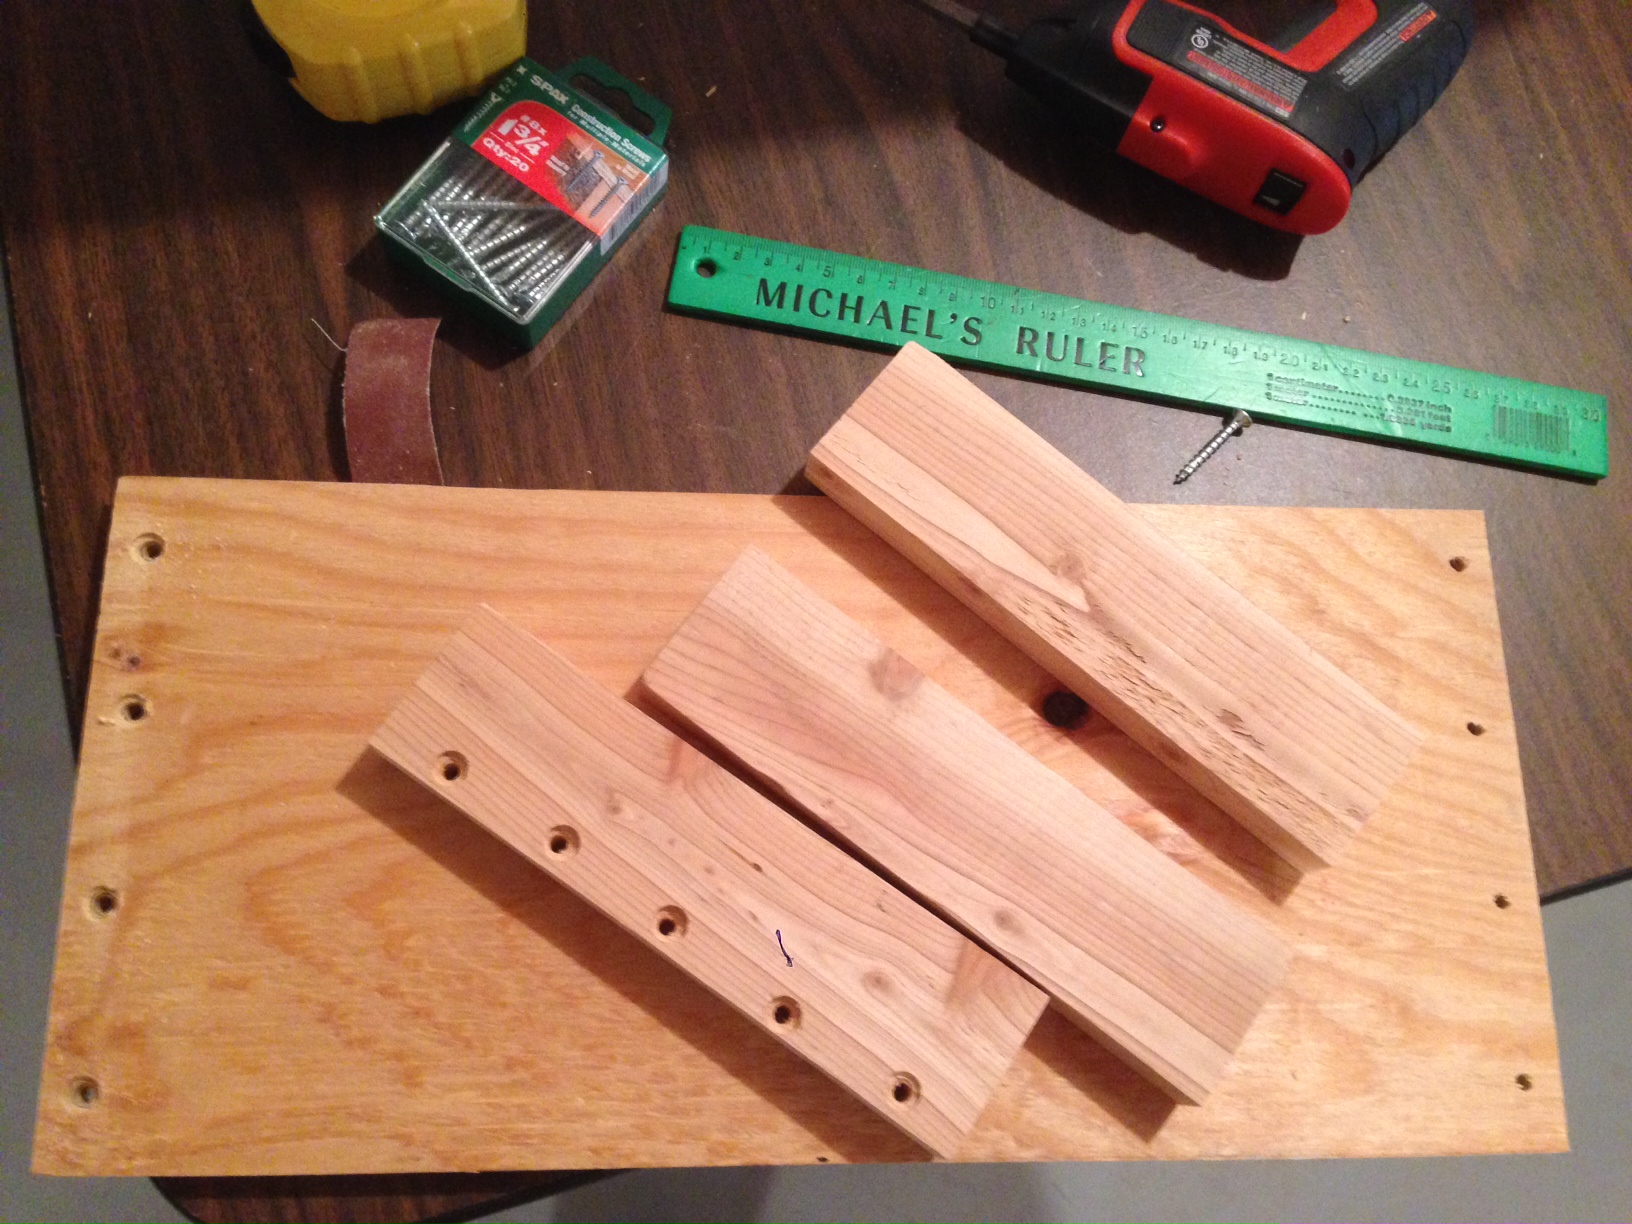
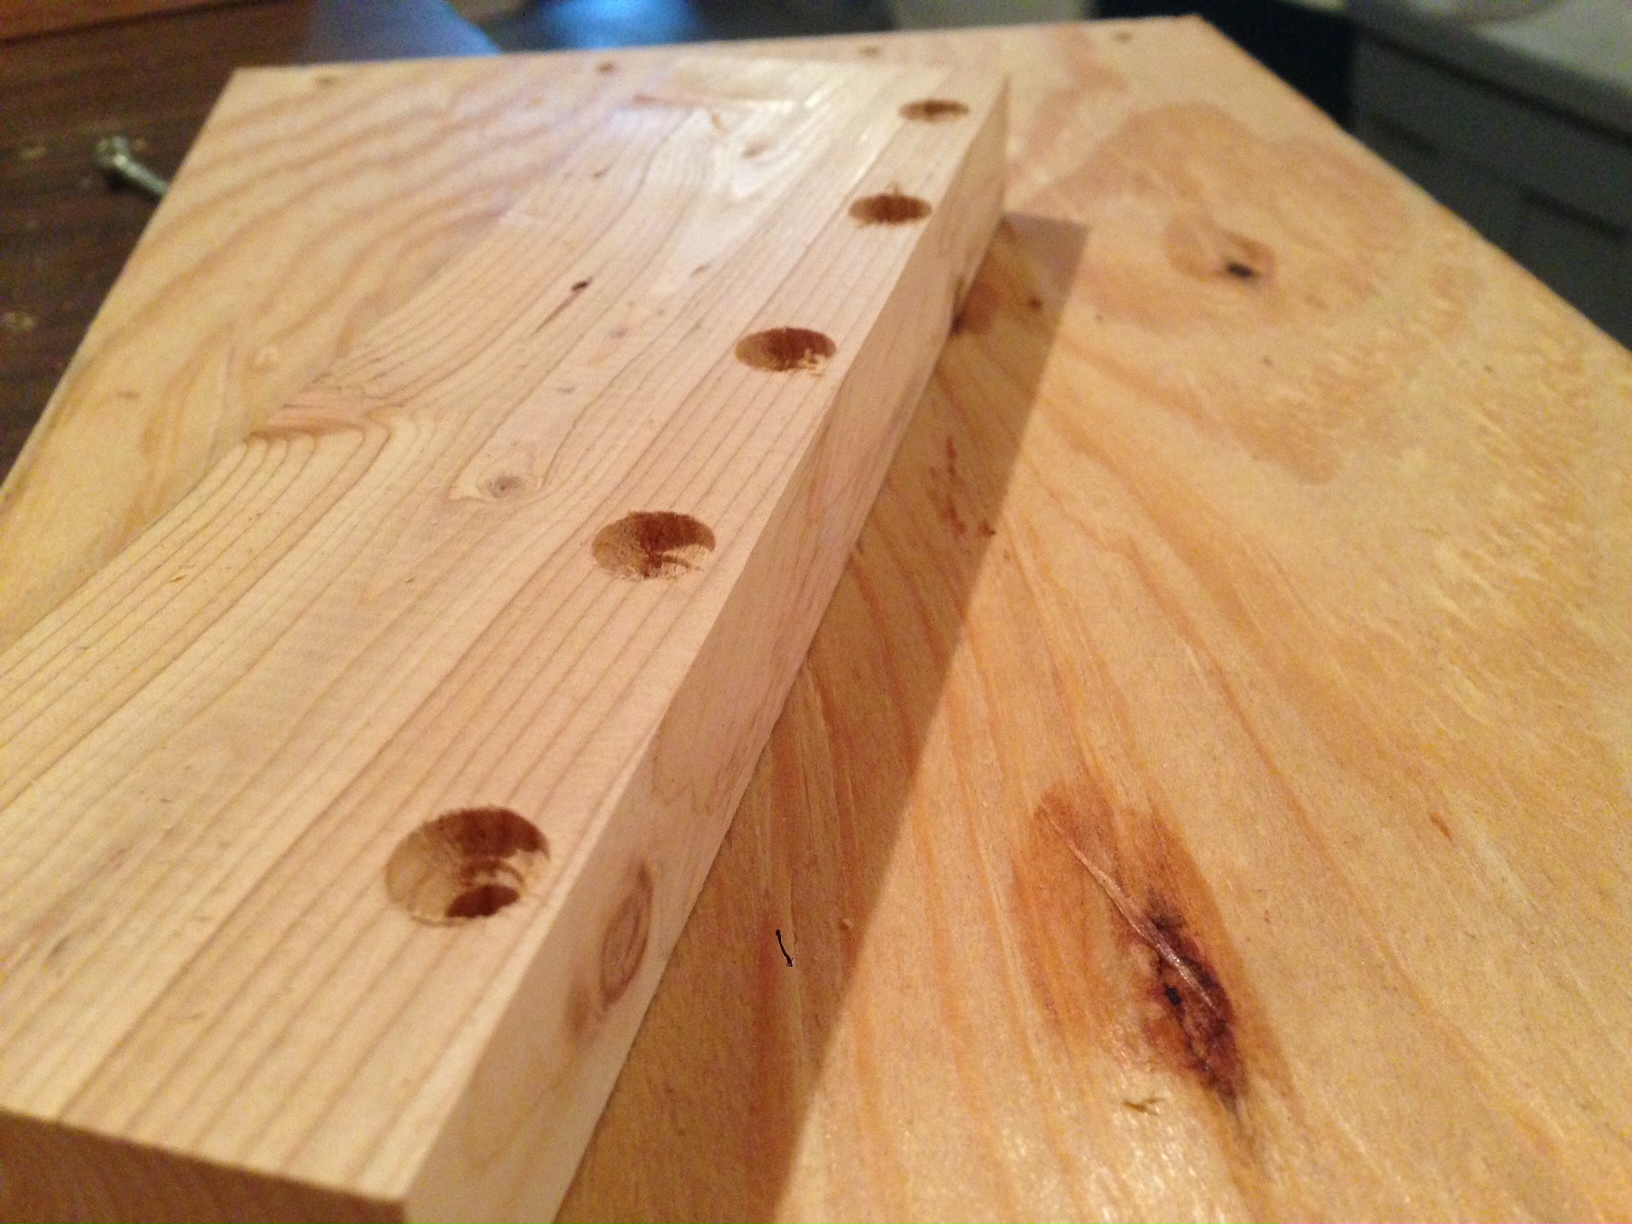
An improvement we made on the more generic instructions listed was to drill indentations slightly into the screw holes. This let us rest our screw heads below the surface of the wood. It is a small improvement, but it does make for a cleaner look and less opportunity to catch on my arms or clothes. We ended up buying 1-1/4″ #8 flat head screws, and used a 3/16″ drill bit to drill pilot holes in the side boards. We then used a 3/8″ drill bit to drill just a little bit into that same location.
The first major thing that stuck out to us while we were assembling was that the 3 side boards that we cut were supposed to all be the same size. However, 2 of the side boards (the front and back) were supposed to rest on top of the board, while the board on the side of the bracing table was supposed to be on the side of the board. While I may have explained that in a confusing manner, the gist of it is that because the side board does not rest on the board, it loses an inch of height compared to the board it is forming a corner with. We did not realize this until we were already putting it together, but figured as a homemade tool it wasn’t a big deal.
One mistake I made was not ascertaining which side I wanted the side board to be on. I typically use my right hand for carving, and only use my left hand if my right hand is cramping up. That should imply a right handed brace where the side board is on the left side. Unfortunately my first go around I happened to put it on the left. We ended up removing it and putting it on the other side, which I suppose makes it an interchangeable brace if I want to unscrew the sides later now that the screw holes already exist.
The last update we made to the bracing table was adding some felt pads to the bottom. Since I have to use this bracing board either on the kitchen counter or my computer desk, it made some sense to try to eliminate the plywood from directly contacting the surface. In an ideal world the felt pads would have also acted as a grip, but that ended up not necessarily being the case (nor should I really have expected as such).
First Impressions
Now that I’m back in the apartment, I did a little bit of work on another basic leaf today on a 4″ x 4″ x 1″ block, and came away with a few thoughts about the bracing table. I’ll be sure to put some more time in before finalizing any of these, but these were my initial impressions:
- Perhaps should have been implied, but I need to be standing while working for the bracing table to be sturdy. If I’m sitting down, there is no pressure against the side of the table to keep it flush against the edge of the table (and not rocking sideways when I attack the wood on an angle into the corner). Instead I need to be leaning into the bracing table.
- I’m not sure about the stability of making the edges on the top and side shorter, as I wouldn’t want the wood to go flying over the top, but it is unfortunate that as I shave off wood at the edge of the board my tools are running into the side of the bracing table. I have to get a little creative around cleaning those edges off.
- I end up pushing both right and left depending on the angle I’m trying to cut, and thus the idea of having just one side all the time doesn’t seem quite as important to me as I lose out on the other side not existing. Obviously having a side is a big deal for stability, but this was one of the downsides to not having a table that physically holds the wood in place instead of providing a wall to lean up against.
At the end of the day, however, I’m happy to finally have it built. It gives me the opportunity to get back into the swing of things now that I have a (portable) workspace to use.